

It is not fashionable or desirable to carry plastic carrier bags these days. I try my best not to acquire new ones and re-use those that I do possess. I’ve noticed around town that the wheeled trolley is becoming more popular and no longer just the preserve of the elderly. Browsing one of my regular haunts I came across just such a trolley – for £1. Still in the process of sorting prior to a house move I was eyeing up the wheels that this bargain offered. Without its dull red cover the frame alone would help move boxes of stuff from A to B. Then of course, I had an idea.
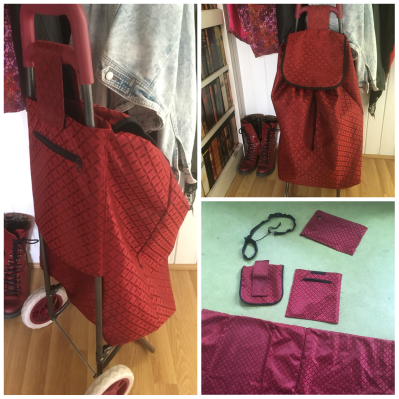
It would be easy to make a new cover. Just as with re-contructing clothes the starting point was deconstructing the existing bag. You can see in the photo above the constituent elements of the trolley bag – the most important turning out to be the drawstring and its channel! With any project like this don’t throw anything away until you’re sure that you won’t need it. As I took the bag apart I made a note to self about the positioning of the piece that secured the bag to the frame. Then I went off to buy some new fabric.
I chose PVC with a colourful camper van motif. And I also bought some black honeycomb fabric, wanting to line the bag and give it just a little more substance. I haven’t sewn PVC before but luckily it didn’t present a problem going under the sewing machine needle. I chose a multicoloured thread (thanks Sophie!). I already had some velcro to attach the strap and a zip. I decided to reproduce the original zip pocket, although I could more easily have sewn a flap pocket closure instead.
Having cut the pieces out from the PVC and honeycomb fabric, the order of sewing was to make the individual elements first; the strap, the back pocket, and the top flap. Next was to sew the back pocket to the main body of the bag (along the sides only so it could slip over there frame. I then sewed the bag shape into a tube, then sewed in the rectangular base. Adding the strap and flap came next, before finally adding the drawstring closure (top left photo below) and a bias binding trim.
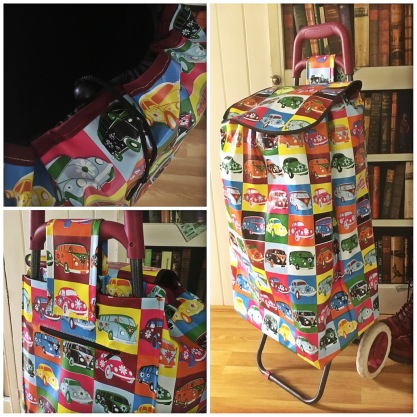
This has been a very rewarding project, and actually easy to do. If you find a bargain trolley – or have an existing one with a worn cover, try your own re-vamp!
